
How to Build Walk-In Showers
Walk-in showers are a hallmark of modern bathroom design, combining style and functionality. Their sleek, open-concept design maximizes space and accessibility.
This comprehensive guide will walk you through the steps on how to build walk-in showers, from initial planning to installation. Whether you’re a DIY enthusiast or working with professionals, understanding the key steps will help ensure your project aligns with your vision and needs.
1. Plan Your Walk-In Shower
Before you start tearing down walls or shopping for shower tiles, thorough planning is essential. A well-thought-out plan ensures your walk-in shower meets your needs, fits your space, and stays within budget.
Let’s begin by understanding the various considerations that will shape your project.
Understand Your Needs
The first step in planning your walk-in shower is identifying your unique needs and preferences. Tailoring your design to accommodate accessibility, aesthetic desires, and budgetary constraints will lay a solid foundation for the entire project.
Accessibility Requirements
Consider who will use the shower and their specific needs. Walk-in showers can be designed for easy access, making them ideal for elderly individuals or those with disabilities. Features like barrier-free entry, grab bars, and built-in seating enhance safety and comfort.
Aesthetic Preferences
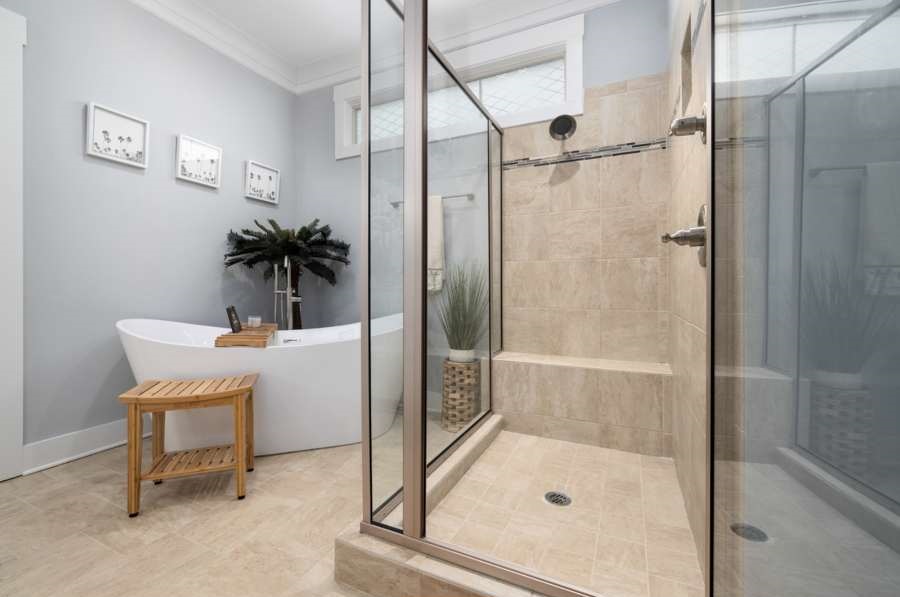
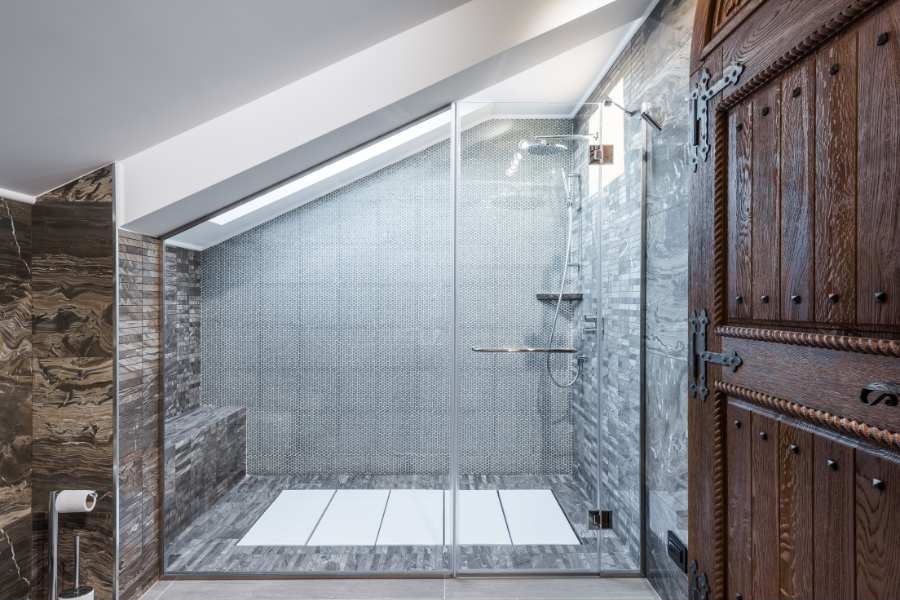
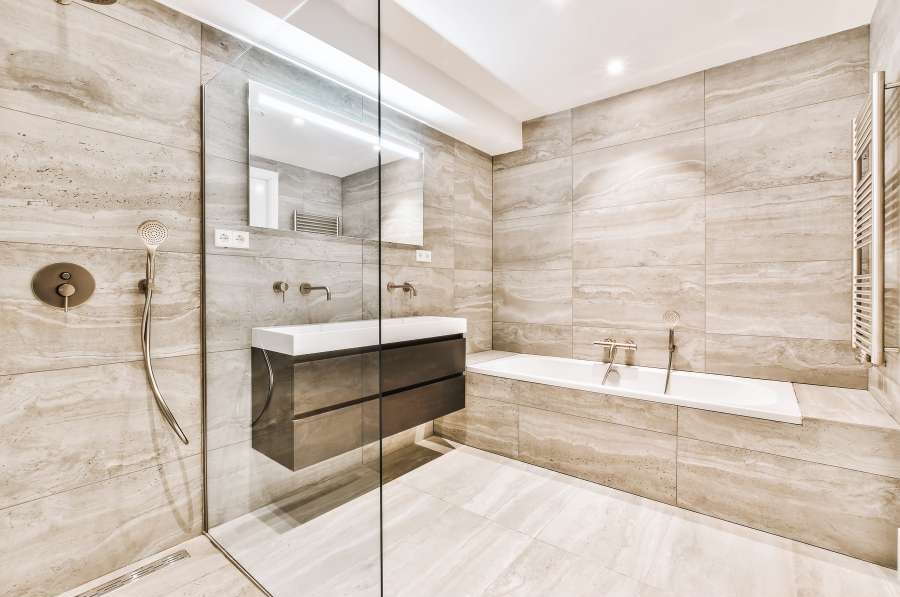
Define the look you want to achieve. Modern and minimalist designs often feature clean lines, glass enclosures, and neutral color palettes. Luxurious designs might include natural stone, high-end fixtures, and custom tile work. Your design choice will influence material selection and layout.
Budget Constraints
Establish your budget early in the planning process. High-end materials and custom features can increase costs, so it’s important to balance your design aspirations with financial considerations. Consider where you can save without compromising on quality or functionality.
Design Considerations

With a clear understanding of your needs, choose the layout, style, and functionality of your walk-in shower.
Space Analysis
Assess the available space in your bathroom. Measure the area where the shower will be installed and plan the layout accordingly. A standard walk-in shower typically requires at least 36 x 36 inches, but larger dimensions offer more comfort and flexibility in design.
Choose the Right Style
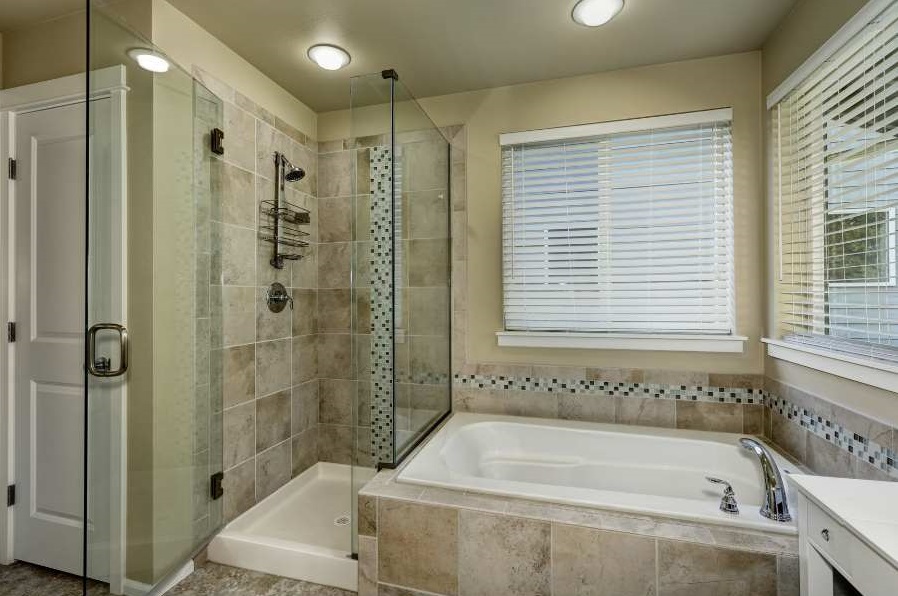
Decide between an open or enclosed design. Open designs, which lack doors or enclosures, can make the bathroom feel more spacious and are easier to clean but may allow more water to escape. Enclosed designs with tempered glass panels or doors contain water more effectively and provide a distinct showering area.
Drainage Solutions
Select the appropriate drainage system:
- Linear Drains: Offer a sleek, modern look and are effective for large-format tiles.
- Point Drains: Are traditional and work well with smaller tiles.
Ensure the shower floor slopes towards the drain to prevent water pooling.
Material Selection
Now that you have a clear design direction, it’s time to choose the right materials. Your selections here will impact the functionality, durability, aesthetics of your shower.
Waterproofing Materials
Choose reliable waterproofing solutions to protect your bathroom from moisture damage. Options include waterproof membranes or boards that are applied under tiles. Proper waterproofing prevents leaks and mold growth.
Tile Options
Select tiles that meet your design and functional needs.
- Ceramic and Porcelain Tiles: Popular for their durability and water resistance.
- Natural Stone Tiles: Offer a luxurious look but may require more maintenance.
Consider slip-resistant options for added safety.
Fixture Finishes
Decide on the finish for your fixtures, such as showerheads, valves, and controls.
- Chrome: Classic and easy to clean.
- Brass: Adds a vintage touch.
- Matte Black: Offers a modern, striking contrast.
Ensure the finishes complement your overall design theme.
2. Prepare the Space
Once your plans are set and materials are chosen, the next step is to prepare your bathroom space for the installation of the walk-in shower. Proper preparation is key to avoiding issues later on and ensuring that your shower installation goes smoothly.
Demolition and Cleanup
Begin by removing any old fixtures, tiles, and materials from the designated shower area. This process can be messy, so take steps to protect the rest of your bathroom and home. Cover floors and furniture, and ensure good ventilation to manage dust and debris.
Remove Old Fixtures
Carefully disconnect and remove any existing shower heads, faucets, and handles. Ensure the water supply lines are turned off to avoid leaks.
Remove Tiles and Walls
Use tools like hammers and pry bars to take down old tiles and backer boards. This might involve cutting through drywall or plaster, so be prepared for substantial debris.
Clean the Space
Once demolition is complete, thoroughly clean the area. Remove dust, old grout, and adhesives to create a clean surface for the new installation.
Inspect and Repair
Check for any signs of mold, rot, or damage behind the walls. Address these issues promptly to ensure a solid foundation for your new shower.
Plumbing Adjustments
With the area cleared, it’s time to make necessary plumbing adjustments to accommodate your new shower design. Accurate plumbing work is imperative for the functionality and safety of your walk-in shower.
Relocate Drains
Depending on your new shower layout, you may need to reposition the drain. This often involves adjusting the floor slope to direct water efficiently towards the drain. Use a level to ensure proper alignment.
Install New Water Lines
If your design includes new or relocated fixtures, extend or reroute water lines accordingly. This may involve cutting and soldering pipes or installing flexible plumbing connections.
Test the Plumbing
Before sealing everything up, test the water lines and drainage to ensure there are no leaks and that water flows correctly. Fix any issues immediately to prevent problems later on.
Waterproofing the Area
Effective waterproofing is essential to protect your bathroom from moisture damage and ensure the longevity of your walk-in shower. Invest in quality waterproofing materials and apply them meticulously.
- Apply Waterproof Membranes: Use liquid or sheet membranes on walls and floors to create a waterproof barrier. Pay special attention to corners and seams, where leaks are most likely to occur.
- Seal Joints and Penetrations: Apply waterproof tape or sealant to all joints, edges, and around plumbing penetrations to create a continuous waterproof layer.
- Check for Coverage: Ensure that the entire area, especially around fixtures and drains, is well-covered and sealed. This is your primary defense against water damage and mold.
3. Build the Walk-In Shower
With the space properly prepared, you’re ready to start building the walk-in shower. This phase involves installing the shower base, tiling the walls and floor, and adding fixtures to create a functional and attractive shower space.
Install the Shower Base
The shower base provides the foundation for your walk-in shower. It needs to be sturdy and properly installed to ensure effective drainage and support the weight of the tiles and fixtures.
- Choose a Base Type: Decide between a prefab shower kits or a custom-built one. Pre-fabricated bases are easier to install but come in standard sizes. Custom-built bases allow for more flexibility in design and size but require more skill and time.
- Prepare the Floor: Ensure the subfloor is level and strong enough to support the base. Reinforce it if necessary and clean it thoroughly.
- Install the Base: Set the base in place, ensuring it slopes correctly towards the drain. Use mortar or adhesive to secure it, and check for any movement or gaps. Follow manufacturer instructions for installation to ensure proper fit and stability.
Wall Preparation and Tiling
Tiling the shower walls is essential for both the aesthetics and functionality of your walk-in shower. Proper preparation and precise tiling work will result in a durable and visually appealing shower space.
- Install Backer Board: Apply a cement backer board or waterproof board to the walls, securing it with screws and sealing the seams with mesh tape and thin-set mortar. This provides a stable, waterproof surface for tiling.
- Plan the Tile Layout: Plan your tile layout before starting. Decide on the pattern, and mark reference lines to ensure the tiles are evenly spaced and aligned. This prevents unsightly cuts and gaps in prominent areas.
- Apply Tiles: Start tiling from the bottom and work your way up. Use a notched trowel to spread adhesive, and press each tile firmly into place. Use spacers to maintain even grout lines and ensure the tiles are level and straight.
- Grout and Seal: Once the adhesive is set, remove spacers and apply grout between the tiles using a rubber float. Smooth the grout lines and wipe away excess grout with a damp sponge. Allow the grout to cure, then apply a sealant to protect it from moisture and stains.
Installing Fixtures
With the tiles in place, the final step is to install the shower fixtures. This includes the showerhead, valves, and any additional features you’ve chosen to enhance your walk-in shower.
- Mount the Showerhead and Controls: Install the shower head and controls according to the manufacturer’s instructions. Ensure they are securely attached and properly aligned with the plumbing connections.
- Install Glass Panels or Doors: If your design includes glass panels or doors, install them carefully to ensure they fit correctly and are securely mounted. This step requires precision to avoid gaps and ensure the enclosure is watertight.
- Add Shelving and Accessories: Install any shelving, niches, or other accessories to complete the shower. Ensure they are properly sealed and securely attached to support weight and resist water.
4. Finishing Touches
Now that the major construction of your walk-in shower is complete, it’s time to focus on the finishing touches. These elements will not only enhance the functionality and appearance of your shower but also ensure its durability and ease of use.
Seal and Waterproofing
Ensuring a watertight seal is imperative to prevent water damage and maintain the integrity of your shower. Proper sealing and waterproofing will safeguard your investment and reduce the risk of mold and leaks.
- Seal Grout Lines: Apply a high-quality grout sealer to the grout lines to protect against moisture and stains. Use a small brush or applicator to ensure even coverage, and allow the sealer to cure according to the manufacturer’s instructions.
- Apply Caulk: Use silicone caulk to seal joints between the shower floor and walls, around fixtures, and along any edges or corners. This flexible sealant accommodates movement and provides an additional barrier against water intrusion.
- Inspect for Gaps: Carefully inspect the shower for any gaps or areas that may need additional sealing. Address these areas promptly to prevent future problems.
Add Accessories
The right accessories can enhance the functionality and convenience of your walk-in shower. Choose accessories that complement your design and meet your practical needs.
- Install Grab Bars: If accessibility is a concern, install grab bars at appropriate heights for added safety. Ensure they are securely anchored into wall studs or use special anchors designed for tiled surfaces.
- Add Shower Benches: Consider adding a built-in or removable shower bench for seating or storage. Choose materials that are waterproof and resistant to mold.
- Install Shelving and Niches: Install shelves or recessed niches for storing toiletries. Ensure they are well-sealed and positioned for easy access while showering.
- Choose Lighting Options: Install waterproof lighting fixtures if your shower requires additional illumination. Choose fixtures rated for wet areas to ensure safety and longevity.
Final Decorative Elements
To complete the look of your walk-in shower, incorporate decorative elements that reflect your style and add a touch of luxury.
- Select Towel Racks and Hooks: Install towel racks or hooks outside the shower area for convenience. Choose designs that match the overall aesthetic of your bathroom.
- Add a Shower Curtain or Door: If you opted for an open design but want to reduce water splashing, consider adding a decorative shower curtain or a glass door.
- Choose a Shower Mat: Place a non-slip shower mat outside the shower for added safety and to protect your floors from water.
With these finishing touches, your walk-in shower will be both beautiful and functional, offering a comfortable and stylish bathing experience.
Maintenance and Care
To keep your walk-in shower looking pristine and functioning optimally, regular maintenance and care are essential. These steps will help you maintain the appearance and longevity of your shower, ensuring it remains a pleasant and safe space.
Regular Cleaning Tips
Keeping your shower clean is vital for both hygiene and aesthetics. Regular cleaning prevents the buildup of soap scum, mold, and mildew, which can damage surfaces and affect your shower’s appearance.
- Clean Tiles and Grout: Use a non-abrasive cleaner and a soft brush to clean tiles and grout. For tough stains or mold, use a mixture of baking soda and vinegar or a specialized grout cleaner.
- Clean Glass Doors and Panels: Use a glass cleaner or a vinegar and water solution to remove water spots and soap scum from glass doors and panels. A squeegee can help prevent water spots if used after each shower.
- Clean Fixtures: Wipe down showerheads, valves, and controls with a damp cloth and mild cleaner. Avoid harsh chemicals that could damage finishes.
- Clean Drains: Regularly check and clean the shower drain to prevent clogs. Use a drain cleaner or remove any visible debris to ensure proper drainage.
Long-Term Maintenance
Beyond regular cleaning, long-term maintenance ensures your shower remains in top condition and addresses any issues before they become major problems.
- Re-Seal Grout and Caulk: Over time, grout and caulk can degrade. Re-seal grout lines and reapply caulk as needed to maintain a watertight seal. This is typically required every 6 to 12 months, depending on usage.
- Inspect for Leaks: Periodically check for leaks around fixtures, joints, and seams. Address any leaks promptly to prevent water damage and mold growth.
- Check for Mold and Mildew: Regularly inspect for signs of mold or mildew, especially in corners and along grout lines. Use a mold cleaner or a mixture of bleach and water to treat affected areas.
- Maintain Fixtures: If your shower has special features like rain showerheads or adjustable nozzles, clean and maintain them according to the manufacturer’s recommendations to ensure they function properly.
Final Thoughts
Building a walk-in shower is a rewarding bathroom renovation project. It can enhance your bathroom’s functionality, style, and value. From thoughtful planning and precise execution to careful finishing and regular maintenance, each step contributes to creating a beautiful and durable shower space. Whether you aim for a modern minimalist design or a luxurious spa-like retreat, the key is to tailor the shower to your specific needs and preferences.
Related Articles:
- Refreshing Your Mobile Home Bathroom: The Ultimate Guide to Mobile Home Showers
- What Are Tubs Made Of? An In-depth Guide to Bathtub Materials
- Hot vs Cold Showers: A Comprehensive Guide
FAQs on Building Walk-In Showers
1. What is the role of a shower pan in a walk-in shower?
Answer: A shower pan, also known as a shower base, forms the floor of the shower and directs water to the drain. It must be properly installed and sloped to ensure efficient drainage and prevent water pooling. Modern shower pans come in various materials, including acrylic, fiberglass, and tile-ready options, making them a versatile choice for bathroom renovations.
2. How do I install a cement board for my walk-in shower?
Answer: Cement board is used as a substrate for tiling in walk-in showers. To install, first secure the cement boards to the wall studs using corrosion-resistant screws, ensuring the edges meet snugly. Seal the seams with fiberglass mesh tape and a thin layer of thin-set mortar to create a stable, moisture-resistant surface ready for tiling.
3. Do I need a shower curb for a walk-in shower?
Answer: While traditional showers often have a shower curb to contain water, walk-in showers can be designed curb-free for a seamless transition, enhancing accessibility. If a shower curb is used, it helps keep water within the shower area, especially in designs where a seamless glass enclosure or other barriers are not used.
4. What is a mud bed, and is it necessary for my shower base?
Answer: A mud bed is a mortar bed used to create a solid, level foundation for a tile shower floor. It allows for precise control over the slope towards the drain. While pre-fabricated shower pans are an alternative, a mud bed is preferred for custom shower designs and uneven floors to ensure a perfect fit and proper drainage.
5. How do I choose the right drain location for my walk-in shower?
Answer: The drain location in your walk-in shower depends on your shower’s layout and design. Center drains are common, but linear drains along the edge of the shower can provide a sleek look and improve water flow. Ensure the drain pipe is properly aligned with the chosen drain location to facilitate efficient water drainage.
6. Can I use frosted glass for my walk-in shower enclosure?
Answer: Yes, frosted glass can be used for walk-in shower enclosures. It offers privacy while still allowing light to filter through, preventing the shower from blocking light and keeping the bathroom bright and airy. It’s a great option for maintaining privacy without compromising on style.
7. How can I incorporate a built-in bench in my walk-in shower?
Answer: A built-in bench, or bench seat, can be incorporated into your walk-in shower by framing it during the initial construction phase. Ensure it’s made from waterproof materials and properly sealed. Adding a built-in bench enhances comfort and provides a convenient spot for showering essentials.
8. What are the benefits of using a PVC liner in a walk-in shower?
Answer: A PVC liner acts as a waterproof barrier beneath the shower pan, preventing water from leaking into the subfloor. It’s an essential part of the waterproofing membrane system, especially when using a mud bed or custom-tiled shower base. Proper installation is crucial to avoid water damage in your entire bathroom.
9. How do I approach the grout step during tiling in my walk-in shower?
Answer: The grout step involves applying grout between the tiles after they are set. Use a rubber float to press grout into the joints, and wipe away excess with a damp sponge. Once the grout is dry, seal it to prevent moisture penetration. Starting from the first row of tiles, work upwards to maintain alignment and coverage.
10. Is building a walk-in shower a big job suitable for DIY, or should I hire a professional?
Answer: Building a walk-in shower is a big job that requires careful planning, precise execution, and knowledge of plumbing and waterproofing. If you have experience with bathroom remodeling, you might handle the project yourself. However, hiring a professional plumber and contractor ensures the job is done correctly, especially for complex tasks like installing the drain pipe, cement boards, types of showers, and shower controls. They can also handle the local building authority process. Hiring professionals can also help achieve a seamless finish and avoid costly mistakes.